Implementing Random Forest from Scratch in Python
This article is a walk-through of an implementation of a random forest classifier without using any implementations from existing libraries.
Motivation
I am recently studying different kinds of machine learning algorithms. The most effective way of learning different algorithms is to implement them concretely. With this in mind, I have previously implemented linear and logistic regressions, which are relatively simple models.
My next target is a type of decision tree algorithm. After some research, it became apparent that random forest and gradient boosting trees are the two most popular and effective tree-based algorithms. Unlike many other types of algorithms, like convolutional neural networks, there is very limited information about how these two algorithms are implemented in “easy-to-understand” code.
After implementing my own version of a random forest following weeks of struggle, I want to share my implementation and the lessons I have learned.
What is Random Forest?
The simple answer is: Random Forest is a type of decision tree algorithm that uses bagging (training multiple trees).
A decision tree asks a question at each node and splits the data into two child nodes: one with examples that respond “yes” to the question and the other with examples that respond “no.” The goal of a split is to group examples with similar labels together. For example:
- In regression, group similar target values together.
- In classification, group similar labels together.
To achieve this, we define a loss function that quantifies the quality of a split:
- Regression Tasks: Use Mean Squared Error (MSE).
- Classification Tasks: Use Gini Index (used in this example).
A Random Forest consists of multiple decision trees, each trained on a subset of features and training examples. At test time, it predicts by taking the majority class from all the trees in classification tasks.
Implementation
Steps for Training a Single Tree in Random Forest:
- Randomly sample features and training examples.
- Find the optimal split by calculating the loss for each possible value of the given feature.
- Split the data at the current node based on the optimal split point.
- Recursively build the left and right subtrees until the maximum depth is reached.
Core Program Function: random_forest
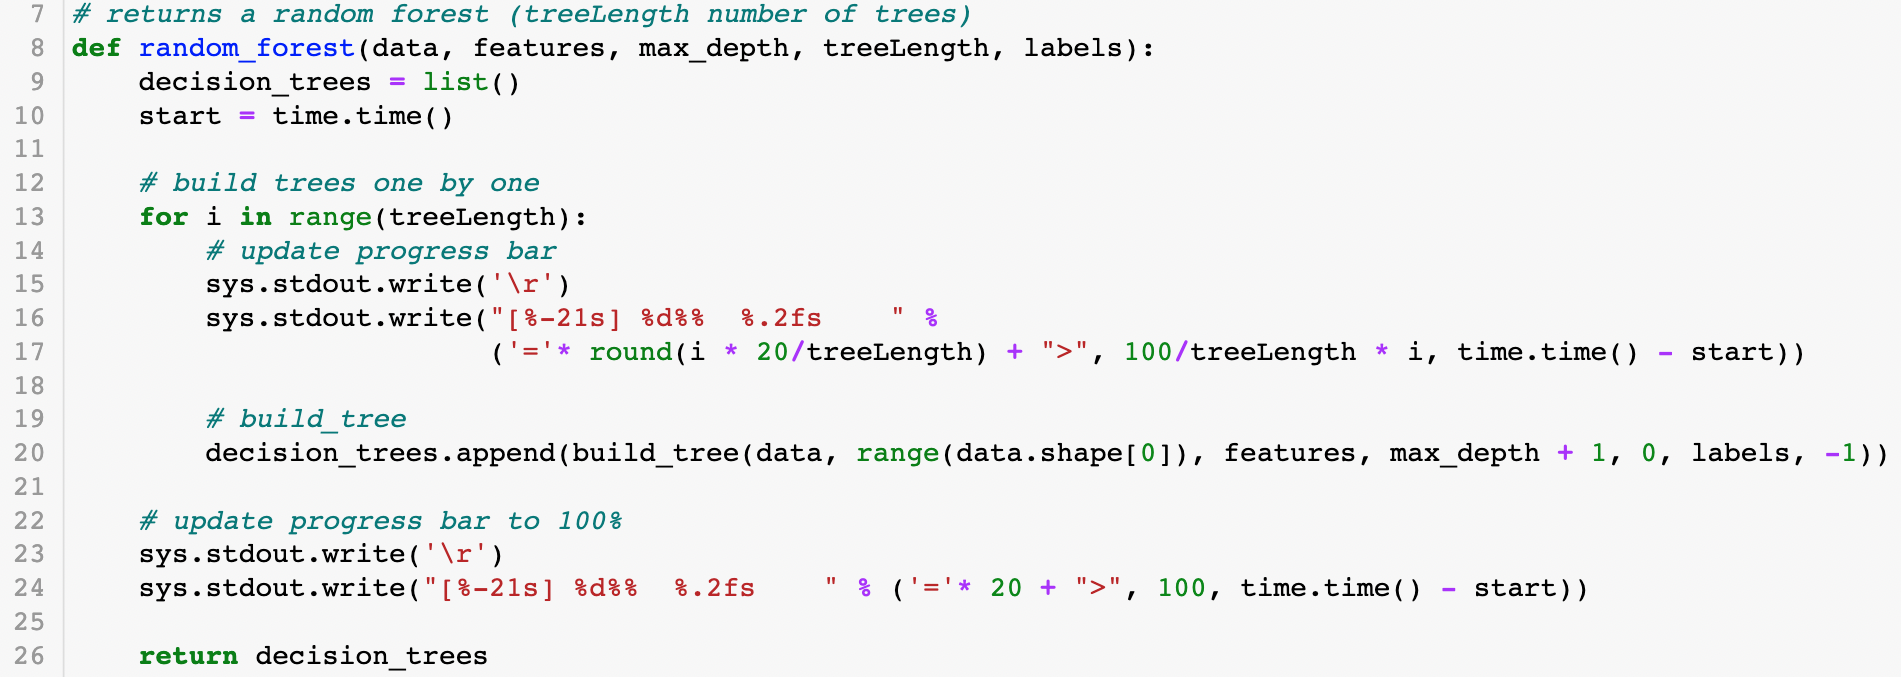
The random_forest function calls the build_tree function multiple times (equal to the number of trees) and updates a progress bar. The resulting trees are stored in a list named decision_trees.

Recursive Tree Building: build_tree
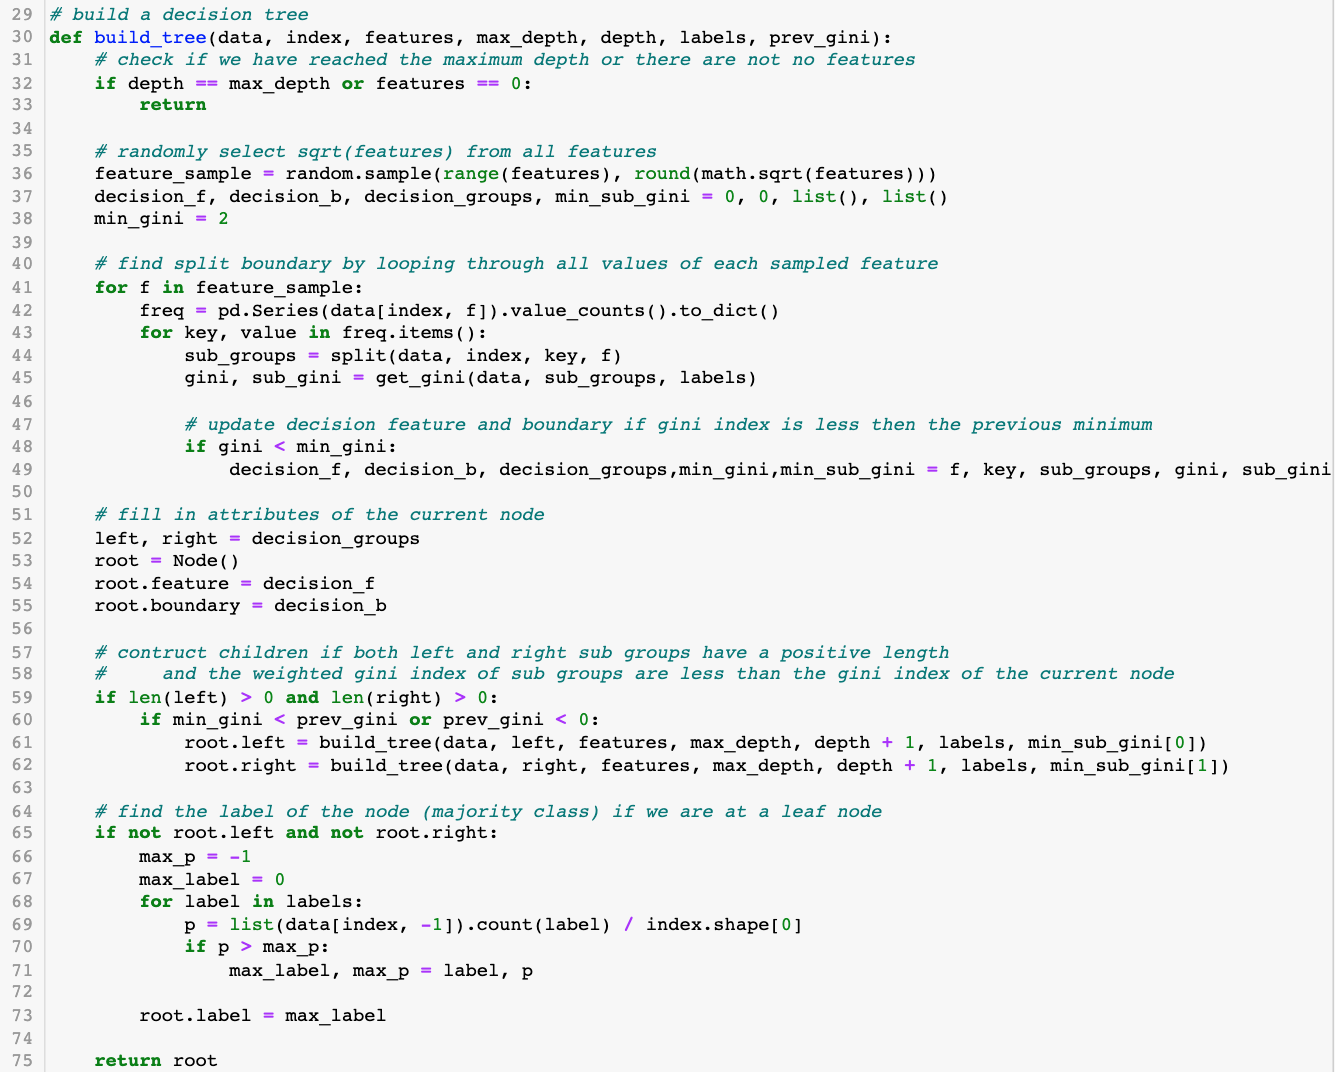
The function build_tree constructs the decision tree recursively. Its base case triggers when:
- The maximum depth is reached.
- There are no features left to split.
Key Sections in build_tree:
- Finding the Best Split (Lines 41–49):
Sample √(total features), then calculate Gini index for each possible split.

- Calculating Gini Index:
The Gini index formula is:

where (p_i) is the fraction of examples with label (i).
A lower Gini index indicates a better split, as it ensures higher node purity.
-
Construct Node (Lines 52–55):
Initialize the node and store the split point. -
Build Subtrees (Lines 59–62):
Recursively build left and right subtrees if:- Both sub-groups have examples.
- The split improves the Gini index.
-
Label Leaf Nodes (Lines 65–73):
Assign the majority label to the leaf node.

Prediction and Evaluation
To predict on a new input (x), the classify function traverses the tree from the root to the appropriate leaf.

To evaluate the model, an n-fold cross-validation is performed using the eval function.

Results
Using 10-fold cross-validation, the implementation achieves 86% accuracy on the validation set.

Parameter Tuning
In Random Forest, two main hyperparameters must be set:
- Max Depth
- Number of Trees
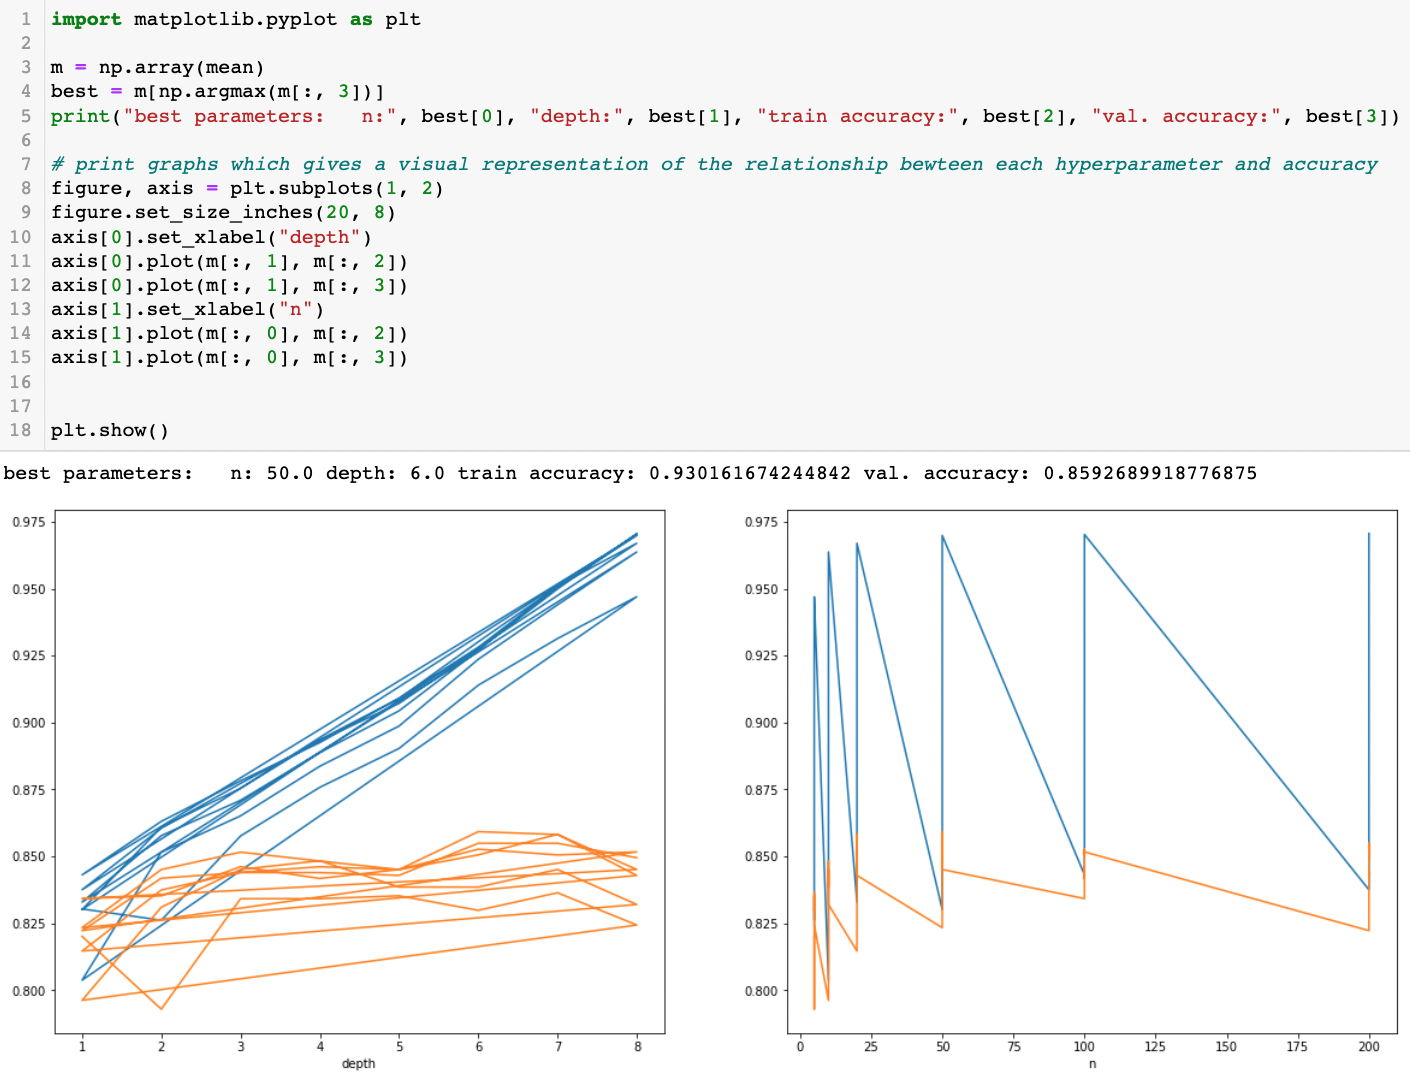
Using the sklearn library for speed, we tested combinations of these parameters. The best results:
- 50 trees
- Max depth = 6
achieved 85.93% validation accuracy.

Full Implementation
For the complete implementation, visit the GitHub repository.